

Like restoring a small piece of Dickensian England, repairing a Victorian fireplace hearth demands care, accuracy, and respect for its original construction. You’ll begin by inspecting the hearth for cracks, loose tiles, damp, and unstable masonry, then check clearances and local building rules. Protect the room before removing damaged materials, and use heat-resistant products throughout. The hidden condition beneath the hearth may determine whether a simple repair—or a complete rebuild—is required.
Key Takeaways
- Inspect the hearth, firebox, chimney, clearances, and subfloor; document damage and check local building regulations before starting.
- Protect the room, isolate the work area, wear appropriate PPE, and carefully remove damaged tiles and unstable mortar.
- Repair weakened joists, masonry, or hearth supports using compatible, heat-resistant materials before installing the new surface.
- Select period-appropriate Victorian tiles, check reclaimed tiles for defects or asbestos, and dry-lay the design for accurate alignment.
- Install tiles with rated adhesive or mortar, maintain consistent joints, allow curing, then grout and inspect the completed hearth.
Inspect the Victorian Hearth for Damage
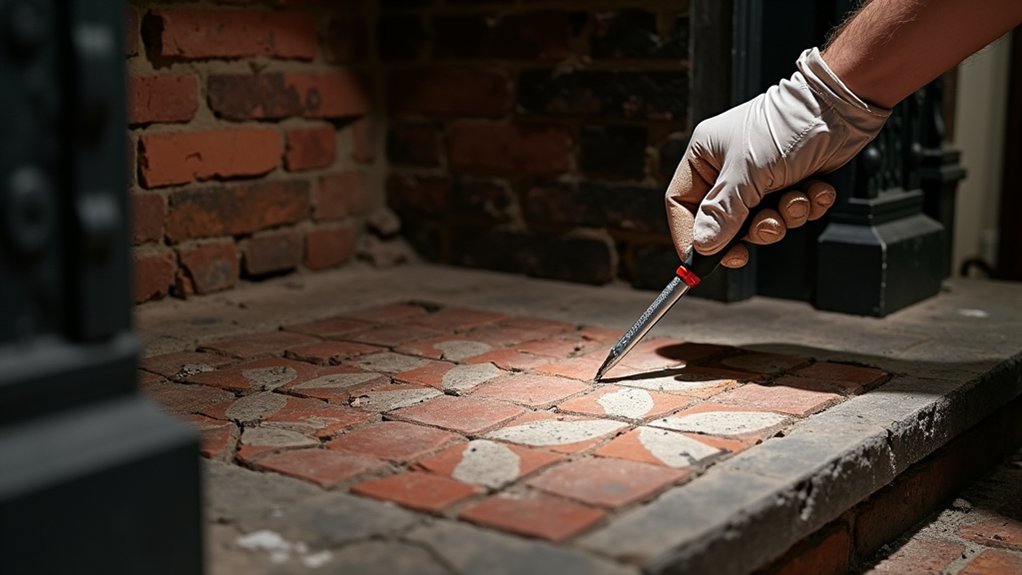
Begin by inspecting the Victorian hearth in good lighting, removing loose ash and debris so you can see the full surface. Wear gloves, eye protection, and a dust mask; don’t disturb suspected soot deposits until you’ve assessed them.
Examine tiles, slate, brick, mortar, and the supporting edge for cracks, spalling, staining, hollow sounds, or movement. Tap gently with a nonmetallic tool and mark every suspect area with removable tape.
Photograph details, including joints, decorative borders, and damaged corners, before cleaning further. Note whether deterioration affects Victorian hearth aesthetics or reveals the hearth’s historical significance, such as original encaustic tiles or hand-cut stone.
Don’t scrape, chip, or apply cleaners yet. Record measurements and observations, then consult a qualified conservation professional if you find unstable material, extensive cracking, or suspected asbestos-containing components during your inspection.
Check Hearth Clearances and Building Rules
Once you’ve documented the damage, verify the hearth’s clearances before removing or rebuilding any material. Measure the distance from the firebox opening to combustible flooring, skirting boards, wall coverings, furniture, and the ceiling.
Record the hearth height, depth, width, and projection beyond the opening, then compare each measurement with your local building code. Requirements can vary by fuel type, appliance rating, listed fireplace design, and whether the hearth is combustible or noncombustible.
Check regulations governing noncombustible extensions, side clearances, recess depth, and required ventilation. If the fireplace connects to a chimney, confirm that its condition and clearance from surrounding timber meet applicable standards.
Contact your building-control office or a qualified inspector before work begins. Don’t rely on historic construction as proof of compliance; preserve evidence and correct hazards before proceeding.
Plan Repairs and Gather Heatproof Materials
Plan the repair around the damage you’ve documented and any clearance corrections required by local regulations. Decide whether you’ll repoint joints, replace cracked tiles, rebuild the substrate, or install a new hearth slab. Photograph and measure surviving features before removal to support historical accuracy. Then match period dimensions, edging, and pattern.
Base material selection should be based on heat resistance and compatibility. Gather fire-rated mortar, refractory concrete, calcium-silicate board, firebrick, and replacement tiles rated for solid-fuel temperatures. Don’t use ordinary cement, plaster, adhesive, or unsealed timber within the heat zone.
Choose a compatible mortar strength; overly hard mortar can damage historic masonry during thermal movement. Confirm every product’s temperature rating and installation requirements, and buy enough for waste and test pieces. Keep manufacturer data, batch information, and local approval documents with your project records for inspection.
Plan curing time before lighting the fireplace.
Protect the Room Before Demolition

Before demolition, you’ll need to remove furniture, rugs, curtains, and decorative items from the work area.
Seal doorways and openings with heavy-duty plastic sheeting and painter’s tape to contain dust and debris.
Keep only essential tools inside the enclosure, and maintain a clear, safe access route.
Clear Furniture and Decor
How can you protect the room before removing the Victorian hearth? Start with a careful furniture arrangement: remove chairs, tables, rugs, lamps, and freestanding cabinets from the fireplace area. Carry each item through a clear route to prevent collisions, and don’t drag heavy pieces across flooring.
Relocate fragile decorative accents, artwork, mirrors, plants, and electronics to a separate room. Detach wall-mounted objects near the hearth, since vibration from demolition can loosen fixings and cause them to fall.
Store small hardware in labeled containers, and photograph complex displays before dismantling them for easier replacement.
Cover remaining immovable furniture with thick, tightly secured protective blankets, leaving enough clearance for safe movement.
Keep children and pets away from the work zone, and inspect the floor for trip hazards before you begin.
Seal Off Work Areas
Once the room is cleared, seal the fireplace area with heavy-duty plastic sheeting from floor to ceiling, securing every edge with low-tack painter’s tape to limit dust migration without damaging finishes. Overlap seams by at least 12 inches, then tape them continuously to strengthen the enclosure.
Cover the floor with reinforced builder’s paper or drop cloths, extending beyond the demolition zone, and fasten the edges to prevent slipping. Install a zippered access flap, and keep it closed whenever you’re not moving tools or debris.
For effective dust prevention, shut doors, close windows, and cover nearby vents with removable filters or plastic approved for temporary sealing.
Place clear safety barriers around the work area, post a warning sign, and restrict entry to authorized workers wearing respirators, eye protection, gloves, and sturdy footwear.
Remove Damaged Tiles, Mortar, and Bricks

Wear safety glasses, gloves, a dust mask, and hearing protection before removing damaged tiles, mortar, or bricks from the Victorian fireplace hearth. Confirm the fireplace is cold, then cover nearby surfaces and place a sturdy container beside your work area.
For tile removal, score grout lines with a grout saw, then lift cracked tiles using a cold chisel and light hammer taps. Angle the chisel away from sound tiles to prevent damage. Scrape loose adhesive and debris from exposed surfaces, but don’t force tools into stable masonry.
Remove crumbling mortar joints carefully with a plugging chisel, working shallowly and steadily. Lift unstable bricks individually, supporting adjacent pieces as needed. Bag rubble promptly to control dust.
Don’t begin mortar replacement yet; first remove all friable material and inspect the exposed hearth for hidden damage.
Stabilise the Hearth Base and Subfloor
Inspect the exposed hearth base for rot, voids, cracking, dampness, or movement before rebuilding.
You’ll need to reinforce weak subfloor support and replace any compromised timber or masonry with suitable, load-bearing materials.
Wear appropriate protective equipment, and don’t proceed until the base is stable, level, and adequately supported.
Assess Base Damage
Before repairing the hearth surface, determine whether its base and supporting subfloor can safely carry the load.
Remove loose tiles, mortar, and debris carefully, then expose enough of the perimeter to inspect the construction.
Check for cracked bricks, washed-out joints, damp timber, rot, insect damage, and movement underfoot.
Use a straightedge and spirit level to identify dips or rocking sections, and probe suspect wood with a screwdriver.
Look below, if accessible, for staining or sagging that indicates moisture-related deterioration.
Photograph defects and mark their locations before dismantling anything further.
Don’t conceal unstable masonry or damaged materials beneath a new finish.
Record the original dimensions and materials, because Victorian design details and hearth aesthetics depend on accurate rebuilding.
If you find structural instability, stop work and consult a qualified professional before proceeding.
Reinforce Subfloor Support
Once you’ve exposed the damaged area, reinforce the support beneath the hearth before rebuilding its surface. Remove loose masonry, ash, and rotten timber, then inspect joists for decay, movement, or insect damage. Don’t rely on a weakened hearth slab to carry new finishes.
Replace compromised timber with treated, appropriately sized joists, or install a designed steel support where necessary. Secure joists to sound structural members using corrosion-resistant fixings, and add noggins to limit movement.
For masonry subfloors, rebuild missing sections with compatible concrete or mortar, compacting each layer carefully. Modern materials can improve durability, but choose products rated for heat and moisture exposure.
Follow safety precautions: isolate utilities, wear respiratory and eye protection, support unstable masonry temporarily, and consult a structural professional before altering load-bearing elements.
Guarantee the base is level, rigid, and fully cured.
Choose Period-Appropriate Victorian Hearth Tiles
Choose tiles that match the Victorian period, typically encaustic or geometric designs in muted red, brown, cream, black, and blue. Research Victorian tile patterns in local architectural references, catalogs, or surviving fireplaces before you buy.
Compare tile dimensions, borders, corner pieces, surface texture, and firing marks; Victorian hearths often used coordinated field and decorative tiles.
Select period-appropriate colors that complement the room without creating a modern, high-contrast appearance.
For authenticity, consider reclaimed tiles, but inspect every piece for cracks, warped edges, glaze failure, and asbestos-containing backing or adhesive.
Wear gloves, eye protection, and a suitable respirator when handling dusty originals.
Confirm that replacement tiles have sufficient thickness and are rated for hearth use.
Keep a measured layout and several spare tiles for future repairs and matching.
Rebuild the Fireplace Hearth Step by Step
Begin by dry-laying the selected tiles on the prepared hearth base, using your measured plan to establish the centerline, border widths, and joint spacing before applying adhesive or mortar.
Check the arrangement against the Victorian design, preserving historical accuracy while balancing the pattern visually.
Wear gloves, eye protection, and a dust mask, and confirm the base is level, sound, clean, and fully dry.
Mix a compatible, heat-resistant tile adhesive or mortar according to the manufacturer’s instructions.
Apply an even bed with a notched trowel, working in manageable sections.
Press each tile firmly into place, twisting slightly for full contact, and use spacers to maintain consistent joints.
Keep adhesive off tile faces, check alignment frequently with a straightedge, and cut edge tiles with a suitable wet saw.
Allow the bed to cure undisturbed.
Repoint the Tiles and Finish the Hearth
After the adhesive or mortar has cured fully, remove the spacers and clean any residue from the tile joints without scratching the surfaces. Wear gloves and eye protection, then vacuum loose dust from every joint.
Mix a compatible, heat-resistant grout to the manufacturer’s ratio; add grout coloring only if the product permits it, and blend thoroughly for consistent shade.
Press grout diagonally across the tiles with a rubber float, forcing it into the joints. Hold the float at a low angle to avoid dislodging tiles.
Wipe excess grout with a barely damp sponge, rinsing frequently, and don’t flood the joints. Shape recessed or flush joints with a suitable tool after the grout firms slightly.
Polish remaining haze with a soft cloth.
Apply tile sealing only when the grout and tiles are fully dry and the sealer is compatible.
Cure, Test, and Maintain the Victorian Hearth
Once the grout and any sealer have cured for the manufacturer’s specified time, keep the hearth dry and free from foot traffic or heat.
Inspect every joint, tile, and edge for cracks, loose sections, discoloration, or uncured material. Don’t light the fireplace until the installer or product instructions confirm that heat exposure is safe.
Test gradually with a small, low fire, watching for movement, odors, smoke leakage, or unusual sounds. Stop immediately if you detect a problem, and arrange professional inspection before further use.
Vacuum with a soft brush and wipe spills promptly using a pH-neutral cleaner; avoid abrasive pads, acidic products, and standing water.
Check the surround and flue annually, and schedule chimney sweeping as required.
Preserve your Victorian aesthetics by repairing damage early, while using the original hearth inspiration to guide compatible materials and finishes.
Frequently Asked Questions
Can I Preserve Original Victorian Hearth Tiles During Rebuilding?
Yes, you can preserve original Victorian hearth tiles. Photograph and label each piece, lift tiles carefully, use gentle tile cleaning methods, avoid acids, and apply preservation techniques; wear protection and consult a conservator.
How Much Does Professional Victorian Hearth Restoration Typically Cost?
You’ll typically pay $2,000–$6,000 for professional Victorian hearth restoration; extensive structural repairs may exceed $10,000. Request itemized estimates covering labor, fireplace maintenance, restoration materials, tile conservation, inspections, and safe, code-compliant installation.
Should I Hire a Specialist for Listed or Historically Significant Properties?
Yes, you should hire a specialist for listed or historically significant properties. They’ll verify Historical accuracy, preserve Material authenticity, obtain approvals, and prevent irreversible damage. Don’t alter fabric before consulting conservation authorities and documenting existing conditions thoroughly.
Can a Victorian Hearth Be Converted for Use With a Modern Gas Fire?
Yes, you can convert a Victorian hearth, but first confirm gas compatibility, structural integrity, ventilation, and chimney safety. Use a qualified engineer for modern installation, preserve listed features, and obtain required approvals before commissioning the fire.
Where Can I Find Matching Replacement Tiles for Rare Victorian Patterns?
You’ll find matching replacements through specialist architectural salvage dealers, tile restoration studios, and custom manufacturers. Since Victorian tiles often vary by batch, request samples, use pattern matching, and verify fire-rated compatibility before installation.
Conclusion
A carefully rebuilt Victorian hearth can restore both character and safe performance. Victorian houses commonly date from 1837 to 1901, so original materials may be over a century old and require expert assessment. Once you’ve repaired the base, installed heat-resistant, period-appropriate tiles, and allowed mortar and grout to cure fully, test clearances before lighting a fire. Inspect annually for cracks, loose tiles, and damaged pointing, and arrange professional repairs whenever heat, structure, or regulations raise concerns.